JAPANESE

ENGLISH
The Customization Instructions (For Ubuntu 18.04 - 22.04)
For Ubuntu 22.04 LTS (Jammy Jellyfish) is here (link to an external in Japanese).
Also, please click Moebuntu Setup Helper2 Main page (link to an external) to see how to easily moe it using scripts! An instructional video via YouTube is also available.
For Ubuntu 21.10 (Impish Indri) is here (link to an external in Japanese).
For Ubuntu 21.04 (Hirsute Hippo) is here (link to an external in Japanese).
For Ubuntu 20.04 LTS (Focal Fossa) is here (link to an external in Japanese).
For Ubuntu 18.04 LTS (Bionic Beaver) is here (link to an external in Japanese).
The Customization Instructions (For Ubuntu 14.04 LTS - 17.04)
1. Install the Ubuntu's default desktop environment.
Get Ubuntu:https://www.ubuntu.com/
2. Get the moebuntu original desktop theme.
Download the moebuntu original desktop theme.
Moe-Pink6 (For Ubutnu 14.04/14.10) : download
Moe-Pink7 (For Ubuntu 15.04) : download
Moe-Pink8 (For Ubuntu 15.10) : download (Updated January 17, 2016)
Moe-Pink9 (For Ubuntu 16.04) : download (Updated July 27, 2016)
Moe-Pink10 (For Ubuntu 16.10) : download (Updated January 31, 2017)
Moe-Pink11 (For Ubuntu 17.04) : download
3. Get the moebuntu original icon theme.
Download the moebuntu original icon theme: MoePinkIcons
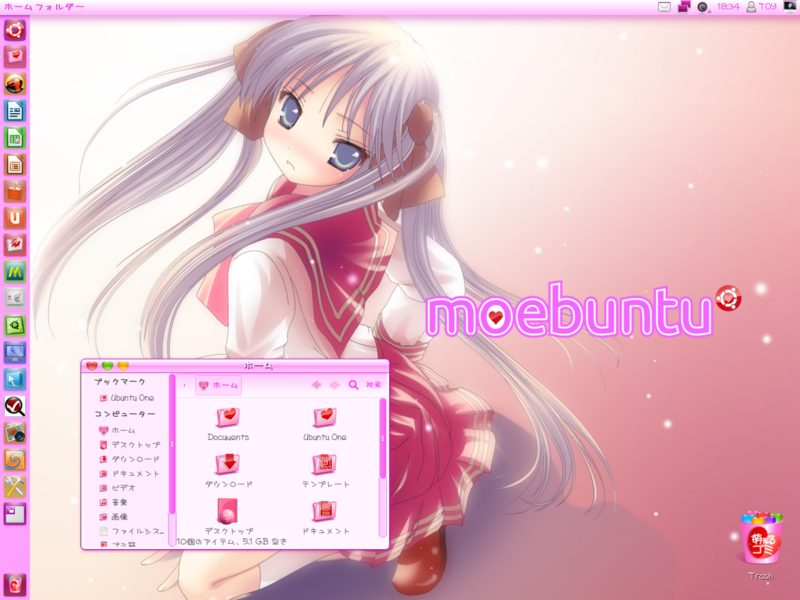
4. Get a moe Desktop Wallpaper for the background.
Search your favorite image from here (Link Collection) and download it.
The signature color of moebuntu is pink so choose a background picture to go with it.
My recommended background picture is
here (アニメ画像@壁紙倉庫 [Animated image@Wallpaper warehouse]).
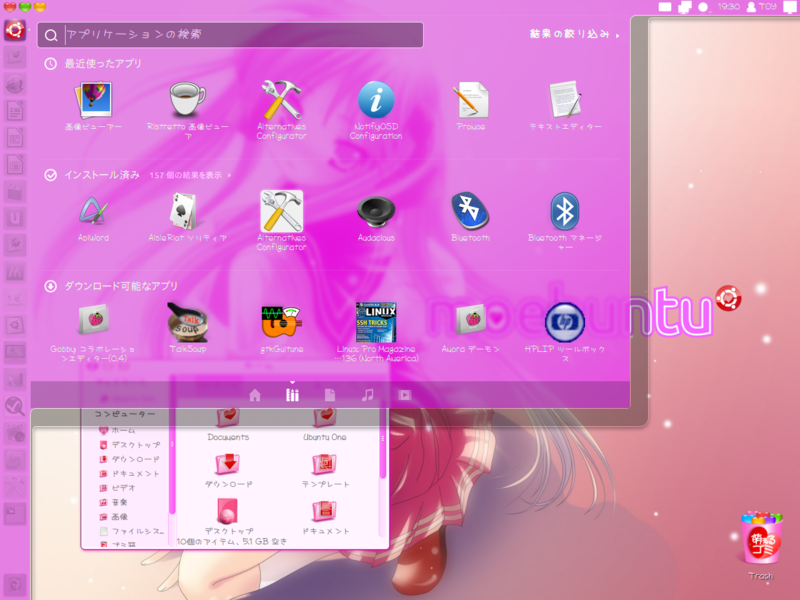
5. Get the moebuntu original Dash icon.
Download the moebuntu original Dash icon.
DashIcons2(Ubuntu 14.04 - 15.10):Download
DashIcons3(Ubuntu 16.04 - 17.04):Download
6. Customize your Ubuntu desktop appearance.
Expand and drop the desktop theme "Moe-Pink(3 - 10)" into /usr/share/themes.
This operation needs to access files and folder as Administrator/Root in Ubuntu:
1) Type "terminal" in the Unity dash search bar, and when the "Terminal" icon is appeared, launch it.
2) In the Terminal window, type in the following command and press Enter, then enter your password and press Enter again.
$ sudo nautilus /usr/share/themes
* To avoid typos, copy-and-paste the command line. (Do not include "$")
(In Gnome Terminal, the keyboard shortcut for pasting is Ctrl+Shift+V. You can also use your right click mouse button.)
* When typing the user's password after the "Password:" prompt appears, you will not see anything appear in the Terminal window. Just type in the password and press Return.
* As well as Ubuntu 11.10, ".themes" in the Home folder won't work properly.
* About accessing file and folder as an administrator: By default, the Root account password is locked in Ubuntu due to security reasons, but the "sudo" command will temporarily provide a user with root-level permissions.
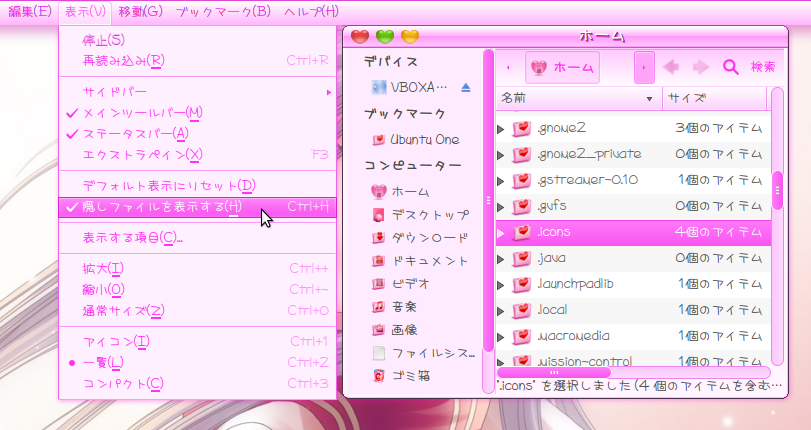
Expand the icon theme "MoePinkIcons" and put it into ".icons" folder in your Home directory.
This is the hidden folder. To show it in Nautilus, select "View" > "Show Hidden Files".
If there isn't, create one.
Now that you have done the preliminary preparation.
[for Ubuntu 14.04 - 14.10]
Next, install "Ubuntu Tweak" via Terminal for changing the Desktop Appearance Settings.
As above, type in the following commands and enter your password in the Terminal window.
$ sudo add-apt-repository ppa:tualatrix/ppa
$ sudo apt-get update
$ sudo apt-get install ubuntu-tweak
When the installation is done, launch "Ubuntu Tweak" searching from the search bar in the Dash.
Open the "Tweaks" tab and click on "Theme".
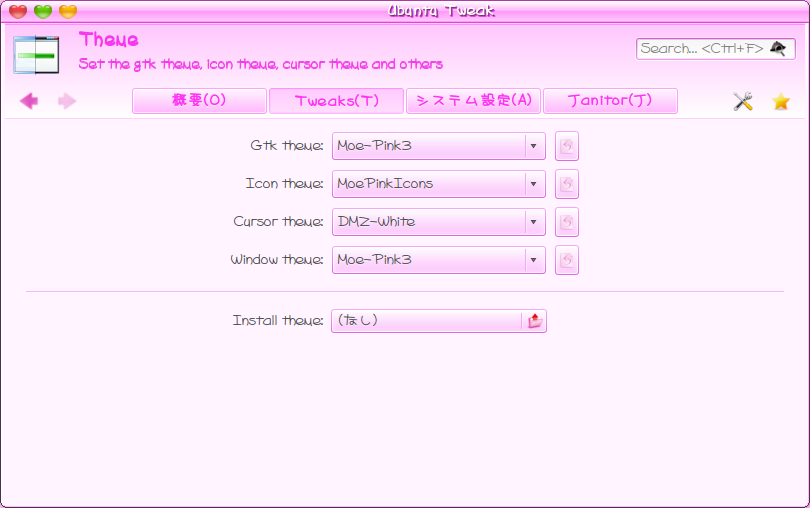
As above,
Gtk theme: Moe-Pink(6)
Icon theme: MoePinkIcons
Window theme: Moe-Pink(6)
change each of the settings to moe-theme/icons.
Now you have changed your desktop theme and icons to moebuntu style.
[for Ubuntu 15.04 - 17.04]
*This supports also Ubuntu 14.04 - 14.10.
Install "Unity Tweak Tool"(unity-tweak-tool) via "Ubuntu Software Center" for changing the Desktop Appearance Settings.
After the installation is completed, launch "unity-tweak-tool" searching from the search bar in the Dash.
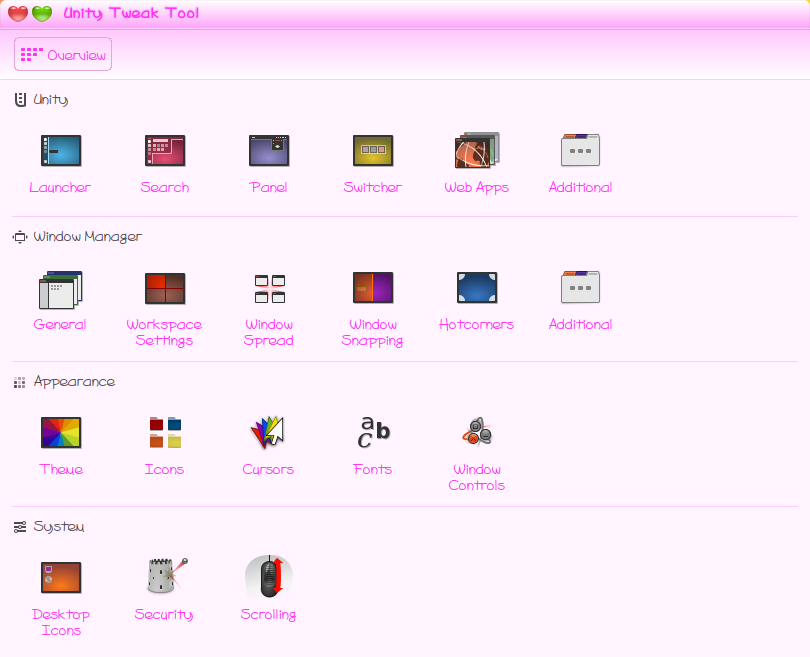
"Appearance" > "Theme" > "Moe-Pink(7/8/9/10/11)","Icons" > "MoePinkIcons"
change each of the settings to moe-theme/icons.
Setting Desktop Wallpaper, use the moe-image (e.g. Lucky_Star_12631....jpg) which has been downloaded before.
In the Nautilus window, double click the file to open it in the Image Viewer.
Right click the image and choose "Set as Desktop Background".

7. Change the Unity launcher color and the Dash icon, etc.
* Before you change the settings of Ubuntu Unity, ensure that your system is up-to-date. In addition, if the settings of Dash icon etc. are reset because of the auto-update of Unity, you need to apply the following instruction again.
First, change the shadow of the main Unity panel and the Dash icon.

Replace the default Dash home button (at the top of the launcher) with the button with a heart on it.
Expand "DashIcons.tar.gz" (the icon data for the custom Dash) which has been downloaded before, and replace some of the icons in the "/usr/share/unity/icons" (14.04 - 17.04) folder with the contents of "MoeDashIcons" folder.
You can access files/folders as an administrator by typing this command into the Terminal.
For Ubuntu 14.04 - 17.04
$ sudo nautilus /usr/share/unity/icons
* In the expanded folder (DashIcons), there is also the "DefaultDashIcons" folder which contains the original Dash icons. If you want to restore the Dash to default settings, Drag and Drop the contents of DefaultDashIcons folder into the "/usr/share/unity/5" and overwrite the custom files with them.
In the "MoeDashIcons" folder, it contains the data of main Unity Panel shadow on each color theme:
panel-shadowBlue.png (blue), panel-shadowBlueGreen.png (blue-green),
panel-shadowGreen.png (green), panel-shadowNavy.png (navy),
panel-shadowOrange.png (orange), panel-shadowPink.png (pink),
panel-shadowPurple.png (purple), panel-shadowRed.png (red),
and panel-shadowYellow.png (yellow).
Rename the file you will use to "panel-shadow.png" and replace the original "panel-shadow.png" file with the renamed one. For details, see the entry on my blog, "萌えDashアイコンちょいアップデート(Moe Dash icon tiny update)" at "Moemoe moebuntu."
* The default "panel-shadow.png" is the same file as "panel-shadowPink.png" in the folder.
*[Attention]:In Ubuntu 16.04 was exchanged the file name from "panel-shadow(.png)" to "panel_shadow(.png)"
Next, change the background color of the unity launcher.
Search and install " CompizConfig Settings Manager (compizconfig-settings-manager)" in "Ubuntu Software Center".
After the installation is completed, launch "CompizConfig Settings Manager" searching from the search bar in the Dash.

"Ubuntu Unity Plugin" > "Background Color": Use the color palette to select a desired color (e.g. #FF4CF6) , "Transparency": Adjust the transparency of the launcher and press "OK".
These settings also affect the appearance of the Dash.
Feel free to adjust them to your favorite settings.
* You can control the color of the launcher with "Unity Tweak Tool"(Search and install "unity-tweak-tool" in "Ubuntu Software Center". ), too. The settings can be done in "Unity" > "Launcher" > "Appearance" > "Colour" .
8. Change your default font(s) to Moe-kei. (Optional)
First, go and get Moe-kei font(s).
Moe-kei Fonts no Matome (PHPSPOT Kaihatsu Nikki)
Moe-kei Fonts (moemoe moebuntu)
You can find your favorite one(s) here.
(You must be careful. Some fonts have a condition of use and/or license fee.)
Here is the sample installation guide: Aiko and あくびん(akubin) (which are my recommendation).
Aiko (FLOP DESIGN) (*have to register)
あくびん(akubin)
* "あくびん(akubin)" Font can be download by clicking the image of a panda bear on the upper-right corner of the homepage > click on the "字形(jikei)" button on the second row of the menu box on the left > click on the "字形入口(jikei-iriguchi)" button at the bottom > then click the "あAa" which is second from the left, second from the top.
Download the fonts from there, and extract them because they are zip files.
Put the font data into the ".Fonts" folder in the Home directory.
This is the hidden folder. To show it in Nautilus, select "View" > "Show Hidden Files".
If there isn't, create one.

[for Ubuntu 14.04 - 14.10]
Launch "Ubuntu Tweak" again, go to "Tweaks" > "Fonts",

As you see the picture above,
Default font: あくびん
Desktop font: あくびん
Document font: あくびん
Window title bar font: あくびん
[for Ubuntu 15.04 - 17.04]
Launch "Unity Tweak Tool" again, go to "Appearance" > "Font",

As you see the picture above,
Default:あくびん
Document:あくびん
Window title font:あくびん
select a font for each of the areas and adjust the font sizes.
("あくびん" is better hand-drawn font for the System.)
The system is 80 percent complete.
9. Change the default font in Firefox to Moe-kei font. (Optional)
Open the browser, go to "Edit" > "Preferences", select the "Content" tab.

Set "Aiko" or "あくびん" font on "Default font:" button in the "Fonts & Colors" section.
I recommend to use the "Aiko" font for the browser, but it is your choice.
Click the close button.
10. Place the moebuntu logo onto the background.

moebuntu logo is here.
(Right Click the link and choose "Save Link As...")
Download and save the logo.
Next, open the image which has been set as the background before (e.g. Lucky_Star_12631....jpg) in Gimp.
Open the "moebuntu_logo (_new) .png" file from "File" > "Open as Layers",
then put it on the background image.
Adjust the size and location of the logo, rename and save it as the native image format of Gimp (xcf) once.
(The XCF format keep the layers so that you can change it afterwards if you want.)
Then, rename and save it as JPEG (jpg) format.
When you click the Save button, "Export File" dialog will open,
click the "Export" button. When the "Save as JPEG" options window open,
drag the "Quality" slider to adjust the image quality and file size if necessary, then click the Save button.
Now the Desktop Wallpaper with the moebuntu logo is complete.
Follow the same procedure as Step 6, from the "Appearance Settings",
replace the Desktop Background with the new Desktop Wallpaper (with the moebuntu logo).
Now the work is complete..
* Gimp can be installed from the Ubuntu Software Center.
* For detailed instructions on how to place the moebuntu logo in Gimp, go to moemoe moebuntu.
Welcome to moebuntu.

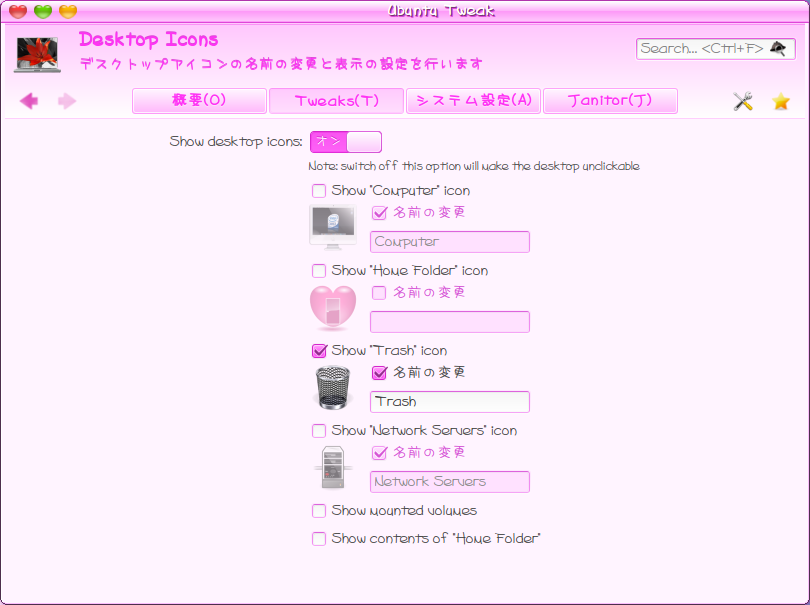
11. Place Trash Icon on the Desktop. (Optional)
Launch "Ubuntu Tweak", go to "Tweaks" > "Desktop Icons", Click "Show 'Trash' icon".
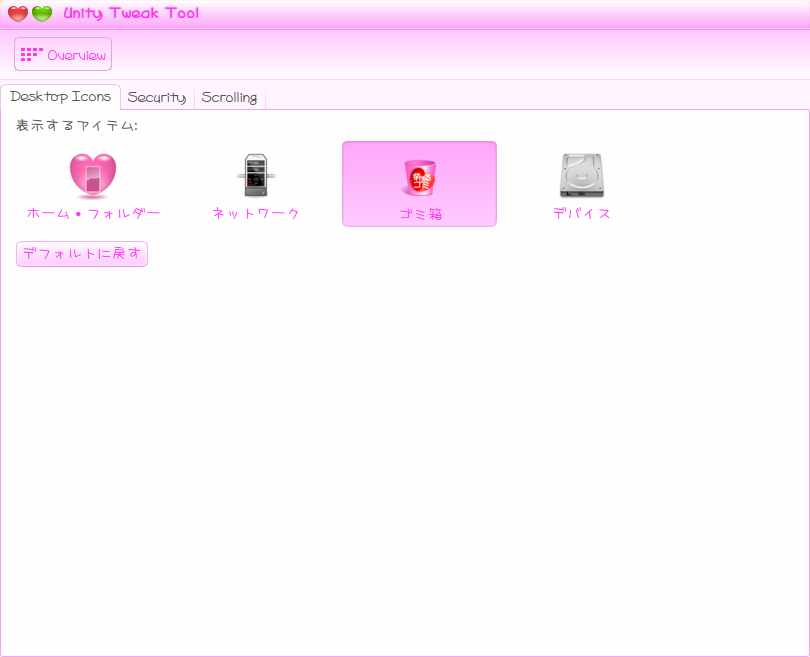
[In the case of "Unity Tweak Tool"]
Launch "Unity Tweak Tool", go to "Desktop Icons", Click "Trash" icon.
12. Change the color of Windows Border Drop Shadow. (Optional)
This can be adjusted with "CompizConfig Settings Manager".
First, search and install "compizconfig-settings-manager" from the Ubutnu Software Center.
【Ubuntu 14.04 - 17.04】
After installing it, launch "CompizConfig Settings Manager" from the Dash,
go to "Ubuntu Unity Plugin" > "Decorations". Applying the settings below,
the color of the Windows Border Drop Shadow will be changed to pinkish.
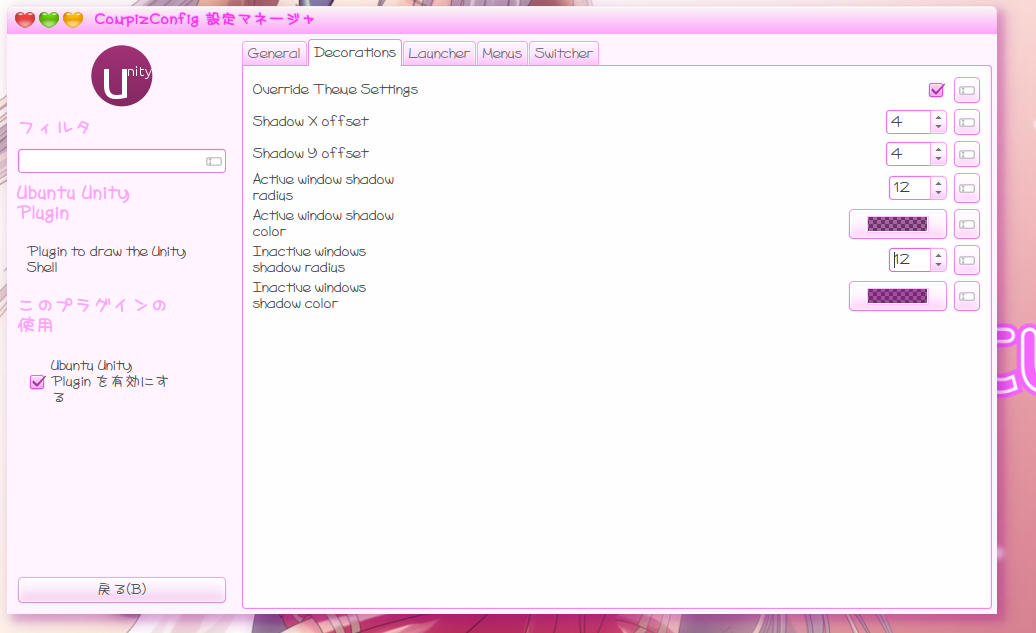
"Override Theme Settings" : Customized settings are applied.
"Shadow 〜 offset" : Offset setting of shadow.
"〜 shadow radius" : Radius setting of shadow.
"〜 shadow color" : Color & Opacity setting of shadow.

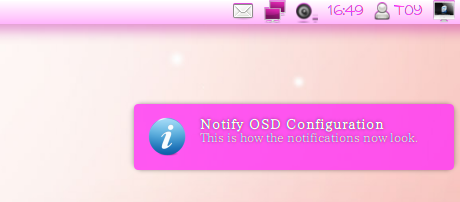
13. Change NotifyOSD bubble color to pink. (Optional)
Open Terminal and run the commands below to install the patched NotifyOSD for Ubuntu:
[for Ubuntu 14.04 - 17.04]
$ sudo add-apt-repository ppa:leolik/leolik
$ sudo apt-get update
$ sudo apt-get upgrade
$ sudo apt-get install libnotify-bin
$ pkill notify-osd
[for Ubuntu 16.10/17.04]
Download & Install the patched Deb package of Notify OSD from Download Notify OSD (patched, .deb).
64Bit:"notify-osd_0.9.35+16.04.20160415-0ubuntu1-leolik~ppa0_amd64.deb" [27-Apr-2016 06:36 116K]
32Bit:"notify-osd_0.9.35+16.04.20160415-0ubuntu1-leolik~ppa0_i386.deb" [27-Apr-2016 06:36 120K]

Then apply them as well.
[for Ubuntu 14.04 - 14.10/16.04]
$ sudo add-apt-repository ppa:nilarimogard/webupd8
$ sudo apt-get update
$ sudo apt-get install notifyosdconfig
[for Ubuntu 15.04/15.10]
$ sudo add-apt-repository ppa:gsn/grabbelkiste
$ sudo apt-get update
$ sudo apt-get install notifyosdconfig
[for Ubuntu 16.10/17.04]
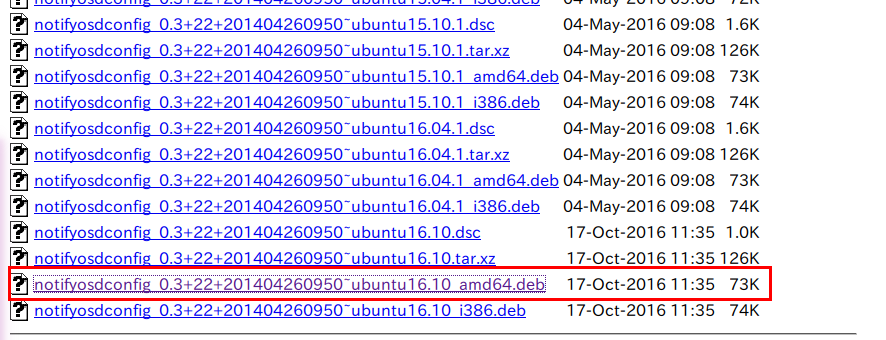
Download & Install the Deb package of NotifyOSDConfig from Download NotifyOSDConfig (ubuntu16.10_amd64/i386.deb).
64Bit:"notifyosdconfig_0.3+22+201404260950~ubuntu16.10_amd64.deb" [17-Oct-2016 11:35 73K]
32Bit:"notifyosdconfig_0.3+22+201404260950~ubuntu16.10_i386.deb" [17-Oct-2016 11:35 74K]
[All common]
Now the preparation is complete. From Dash (search bar), launch "NotifyOSD Configuration".
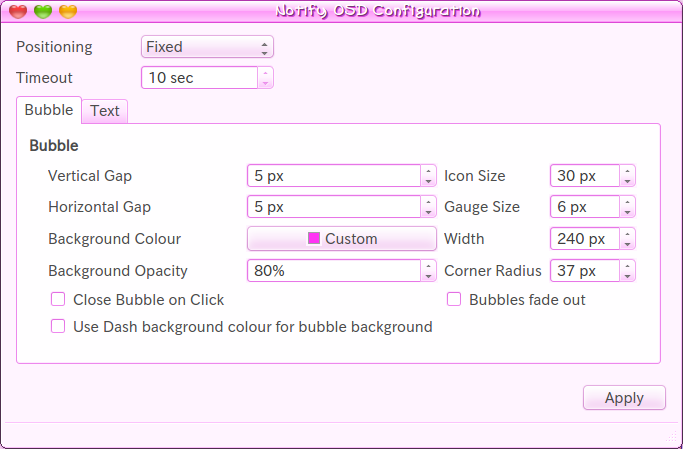
First, uncheck the checkbox of "Use Dash background ..." in the bottom of "Bubble" tab.
The reason is that if the checkbox is checked, the bubble color does not change.
Next, click "Background Colour" selector, and when the color palette appears,
select "..." so that the color select window appears.
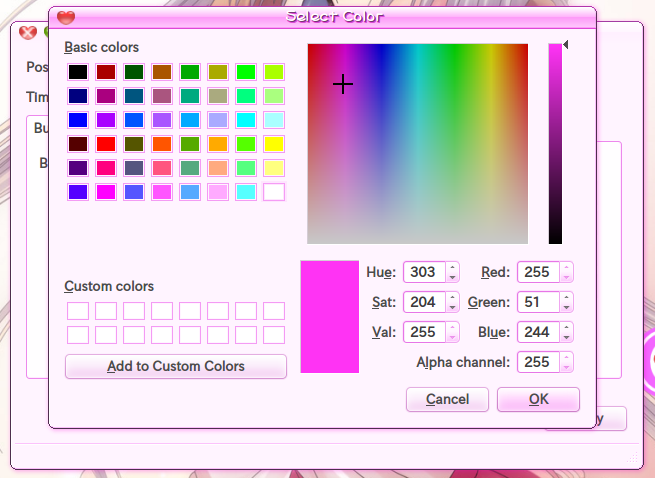
You can freely set the color with RGB numbers in it.
In the example above, the color is strong pink "#ff33f4" (R:255 G:51 B:244) which is used as Moe-Pink theme.
The default text color in the bubble is white, so you should choose strong color.
And you may adjust "Background Opacity" setting.
If you prefer to use a faint color for the bubble, go to "Text" tab and adjust the text color.
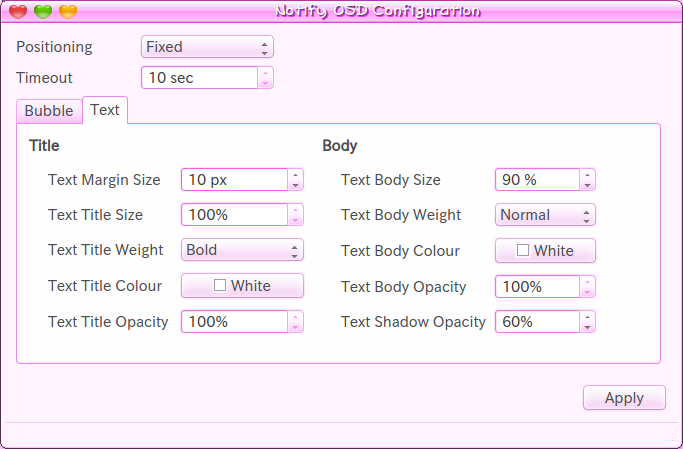
In addition, the default Body Text Color is "Light Grey".
It may be better to change it to "White", the same color as Title Text.
Then, "Text Shadow Opacity" handles the darkness of the Text Shadow.
If the Text Shadow is too dark, reduce it to about 60%.
Press "Apply" button. You can confirm the appearance of the notification as above.
For further customizations: